|
|
|
|
|
| Download this tutorial for printing. |
.•:*:•. The Devardi Glass Tutorial Series .•:*:•.
by
Fine Folly Glassworks
MAKING BEADS
PART TWO
A QUICK OVERVIEW
Mandrels, Bead Release, Mandrel Preparation & Basic Bead Making,
Cooling or Annealing, Removing Your Bead & Cleaning It
A QUICK OVERVIEW…
This section will give you an introduction to the tools and steps used in making a basic
round bead. This Overview is not intended to replace the detailed Tutorials on the
Devardi Website. You should also have read through Part One of this Overview before
beginning. The intent is that this Overview used in combination with the Tutorials and
Devardi videos will give you in-depth instruction and have you well on your way in your
new bead-making career.
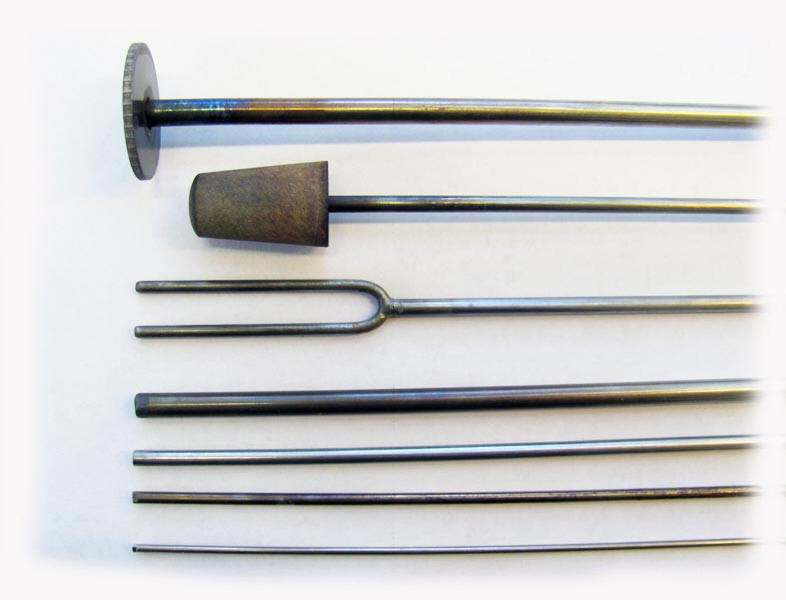
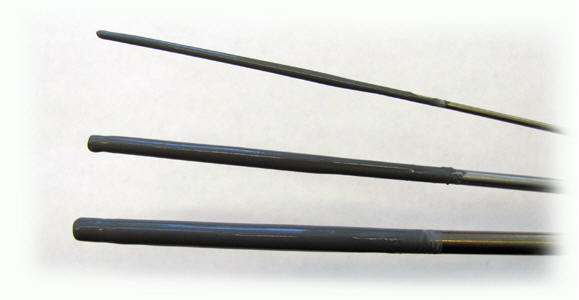
Mandrels… There are just about an endless number of mandrels to choose from.
Generally when you are beginning you want to use a thicker mandrel, like a 3/32 inch or
so. Later on when your skills and glass control develops you can have fun trying the
different sizes and styles. You can see some different mandrel styles in the picture above.
The top mandrel is for making cabachons or flat surface decorated discs, then there is a
thimble mandrel, next a two-hole Button mandrel, then a Big Hole Bead mandrel and
finally, three sizes of regular bead mandrels.
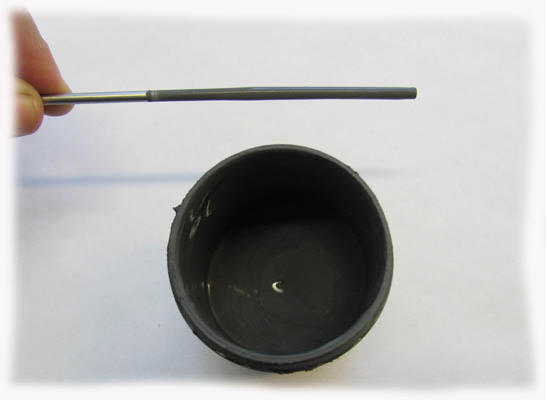
Bead Release… is a coating that you need on your mandrel to prevent hot glass from
permanently sticking to it. You want an even coating without bumps or streaks so that
your bead hole is round and the inner channel is smooth inside.
Before you dip the mandrel of your choice you need your Bead Release to be about the
thickness of a thin pudding or a bit thinner. You should end up with a 1/16" to 1/8'' thick
coating after you dip a mandrel. Bead Release comes in many strengths, depending
on what you need for the work you do in the flame. You need to read about them
online if you want to try the different types. When you are just starting out you can use
the standard types that come with a Kit or are readily available for most soft glass work.
After making a bead I can usually wash out my Bead Release using simple Walmart
variety Pipe Cleaners and running water. Walmart also sells a Bead Reaming and
Cleaning Tool that looks like a small Ice Pick. Whatever brand of Bead Release that you
choose, preparing your mandrel in the flame AFTER it is dipped and before you add your
glass is critical to your bead making success. I discuss this in the next section.
You should know that Bead Release that has gotten to thick needs to be diluted with
with Distilled Water or Alcohol. Stir it well, getting rid of any lumps. Then shake it very
well. Bead Release usually has graphite in it and you want the ingredients well mixed. If
your Bead Release is to thick then stir it well, thin it and then shake it again before
dipping your mandrels.
Some Bead Release must be air dried and some can be flame dried. Which ever type
you use, you still need a can of rice or a rack to stand your mandrels upright in. They
should not touch each other.
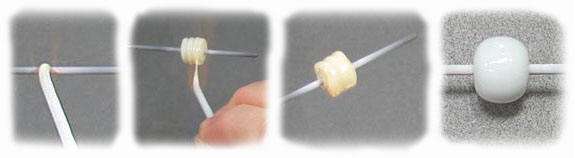
Mandrel Preparation, Flame Drying & Basic Bead Making… Dip your mandrel into the
Bead Release and then pull it slowly out. If you have a bad dip you can put it back in
the jar and roll it against the side of the jar to smooth it out. When you see that you have
an even coating, stand the mandrel upright to dry. You can use a can of rice or Kitty
Litter, or make a wooden rack by drilling holes in it. Your mandrels shouldn't touch each
other.
If your Bead Release says it can be flame-dried you can wave the wet mandrel high in
the back part of the flame to begin the drying. If you are flame-drying, watch the color
change as you roll and dry your mandrel higher in the flame. Once it has changed color
along the entire length of the Bead Release, bring it forward into the working part of the
flame (4" or more from the Torch head).
Now start re-heating it beginning at one end, and rolling it and slowly moving it along in
the flame. Sometimes you can see gas form and leave the mandrel (a quick process) as
you slowly heat and move the mandrel along in the flame. THIS step is done every time
even if you air dried your mandrel. You want to bring your mandrel to a glow along it's
entire length and make sure that all the gas has escaped or it will produce bubbles in
your bead. In fact, it can KEEP ON producing bubbles in your bead until all the gas has
escaped under the glass! You sure don't want that. These bubbles can rise up through
the hot glass and pop open on the surface of the bead, leaving a channel down to the
mandrel. It is not easy to close up or deal with. It's better to prevent it to begin with by
good mandrel preparation before you start your bead.
After your mandrel has been prepared in this way, you then heat the area you will wrap
glass on, so that it glows before you apply your glass with a Stringer or a rod.
Use the Tutorials on the Devardi website that show you how to wrap glass on your
mandrel and make round beads. They show you how to make beads with a Stringer or a
rod of glass and contain a lot of information.
The Devardi website also has many videos that you can watch to see things done in
person. You want to practice wrapping glass on your mandrel to get an even wrap for a
smooth bead-hole. If you get a bad wrap put discard it in your pot of water and clean
the mandrel later. A bad wrap is very hard to correct when you are just beginning.
Practice making small beads until you can consistently make them using a Stringer or a
rod of glass. Once you have this as a foundation you can learn the endless ways to
decorate and encase your beads.
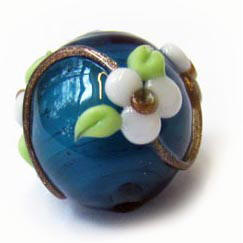
How about some quick pictures in sequence, to see beads actually being made?
The pictures above show a bead being made with a stringer. The pictures below show a
bead being made with heat to shape it. The bottom row of pictures shows how to make
a bead using stiff glass and a tool and Bead Roller to shape and finish it up with.

Some glass is more heat sensitive than others and benefits from the use of a tool and a
Bead Roller in shaping, because it needs to be worked as quickly as possible.

These quick views show you the steps taught in the different free Tutorials on the Devardi
website. They are not meant to substitute for the Tutorials. I encourage you to go to the
website and print them out and read them before you begin to make beads. I hope
you enjoy using them and refering to them until your skills are developed to the point of
not needing them for reference. They are full of great tips and instruction.
Once you have made your bead, the next step is to anneal it or slowly cool it so it
doesn't crack. When you have finished making your bead it actually needs to be
annealed to remove the strain from the glass. That's what annealing does – it brings all
the glass in the bead to the same temperature and holds it there until it relaxes together,
and then it cools it down at a controlled rate to prevent new strain from forming. Not
annealing your bead can cause cracking now or in the coming weeks or months.
Cooling to fast also causes cracking. Here is some information on cooling and
annealing, and there is more in the first part of this Bead Making series.
One Definition of Annealing:
''to subject (glass) to some physical treatment, especially heating,
that removes internal stress''
When you make beads on a torch you introduce stress into the glass as you form and decorate
your bead. This stress needs to be relieved and the bead also needs to be cooled at a rate that
does not cause cracking. A controlled annealing cycle in a kiln is the process that accomplishes
these things. Some people cool their beads as slowly as possible and then anneal them in
batches, or they have someone else anneal for them. Some people skip annealing, and make
their beads and then cool them as slowly as possible and hope for the best.
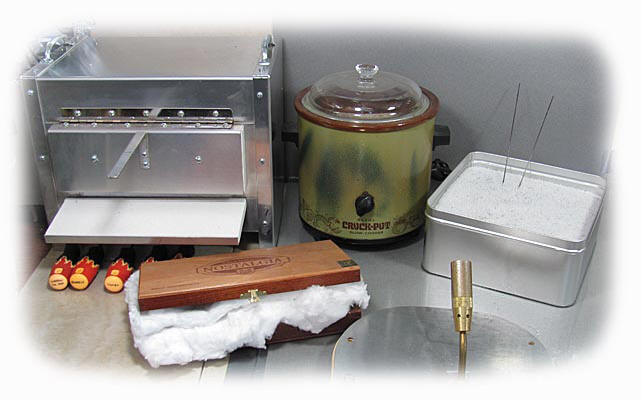
If you do not have a bead-annealing kiln to put your work in after you finish it, then you probably
use either a Fiber Blanket, a crockpot full of Vermiculite, or what are called Annealing Bubbles. I
have used each one of them and for beads ¾'' and smaller I found that the Annealing Bubbles in
the Tin Box were the most effective at slowly cooling my beads. When I first started I would wrap
my crockpot in a fleece blanket. I had the crockpot set on high and then turn it off after a few
hours, but that is not recommended and can cause your crockpot to overheat and start a fire.
As you can see by the faded paint on the crockpot in the picture above I am fortunate that it
didn't cause one…
In reality, even the Annealing Bubbles are inadequate for all but small spacer-sized beads when
it comes right down to it. If you continue in lampworking you need an annealing kiln. Annealing
causes the stress that is in your bead to relax, and to cool at the same rate not to reintroduce
more stress. This makes the bead more durable as a result. Devardi offers a Rod-Warmer sized
Mini-Annealer. It would be the least expensive option to anneal and cool beads. Another
option you might like to know about is through The Glass Hive. They allow you to put a kiln on
layaway and take as long as you like to pay it off, and that is what I did. You can see their ‘Short
Guy’ kiln in the picture above. It’s a great little kiln. The Glass Hive is online at
www.theglasshive.com if this interests you. They frequently have sales where they reduce the
price or pay for the shipping, and they pre-program the kiln for you.
To locate Annealing Bubbles, do a search for ‘Annealing Bubbles’ online and find the best price
for them in the large Tin. They need to be in metal to work best and the larger Tin lets you put
many beads in it during a work session at the torch. The supplier I got them from is
Once you have made and cooled your bead you will need to remove it from the
mandrel. The next steps will cover that process. It may surprise you to learn that there
are steps to remove a bead from a mandrel, but most things that are done well have
some sequence of events.
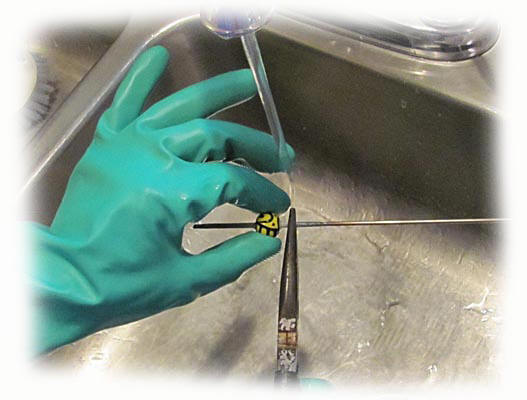
Removing Your Bead From The Mandrel And Cleaning It… To remove a bead from your
mandrel, dip it in water that’s the same temperature as the bead. The reason to wet
the mandrel is to prevent the bead release from producing dust that you might breathe.
Such dust can accumulate in your lungs and may contribute to a disease known as
Silicosis, which is a lung disease caused by inhaling particles of silica, etc. I put my beads
on mandrels in a jar of water and soak them for awhile before removing them. Then I
hold each bead under running water and do these steps.
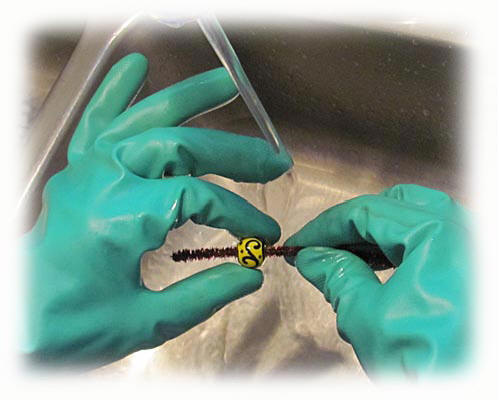
Once you've wet or soaked your beads on mandrels… use long/needle-nose pliers to
hold the bead under running water. Grip the mandrel just to the right of the bead –
about 1/4 inch. Use your fingers to hold the bead and gently start to turn it on the
mandrel – gently turn back and forth (make 1/8 inch or less turns to start) to break the
bead release. Then make small half-twists back and forth as you move it to the left,
toward the end of the mandrel. Move the pliers along after your bead to keep from
torqueing and bending the mandrel.
 |
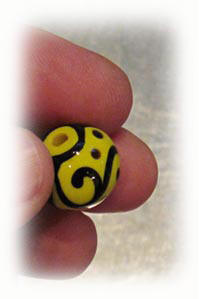 |
Next, clean your bead using running water and the tools of your choice. I usually use a
simple Pipe Cleaner from Walmart and Dish Soap. Dry your bead and enjoy using what
you have made. Remember to check the Devardi website for more free Tutorials from
time to time.
Happy bead making!