|
|
|
|
|
| Download this tutorial for printing. |
Fine Folly Glassworks
Presents
.•:*:•. A Critter Tutorial .•:*:•.
with
Introduction & Critter Making Tips
How To Make
'KATIE The Kitty'
...How To Make Critter Beads...
INTRODUCTION & OVERVIEW (From the CRITTER TUTORIAL WORKBOOK)…
This Workbook is a nice big collection of Critter Tutorials with lots of How-To Information and
general lampworking tips. You are welcome to make these Critter Beads for your own use or to
sell if you like. The Workbook has been assembled using a Spiral Binding to allow it to lay flat, in
case you want to use it as a reference at the torch.
Each Critter Tutorial includes many pictures and the step-by-step text to show you how to make
it. Every Tutorial has a list of the tools used, but you can substitute whatever you like to work
with. Variations of the Critters are shown in the Tutorial if they have been made up. A simple
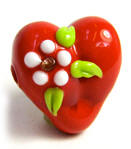
Sweet-Heart Tutorial is included because many people would like to know how to make a basic
heart shape easily.
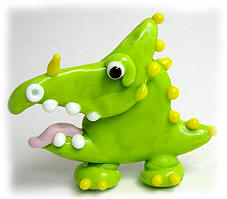
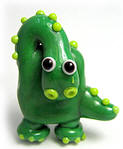
All of the Critters were made with COE 104 glass. You can change the colors of glass as you like.
If a softer glass is needed to form the Critter we have indicated it. Softer glass will help make
some of the Critters like Slim the Lizard, Freddie the Frog and the dinosaurs. It allows little toes
and details to merge easily and allows slumping or free-form sculpture work to go more
smoothly, but feel free to substitute and experiment!
The Tutorials show you how to make Critter Beads with the mandrel in the sideways position.
Creating Critters in the sideways position allows for easier work on the face and head details,
which is a big plus if you are new to making Critters. It will also allow you to be able to string
them sideways. You can make these Critters with the mandrel in the upright position with just a
bit of adjustment.
.•:*:•..•:*:•.
 .•:*:•. .•:*:•.
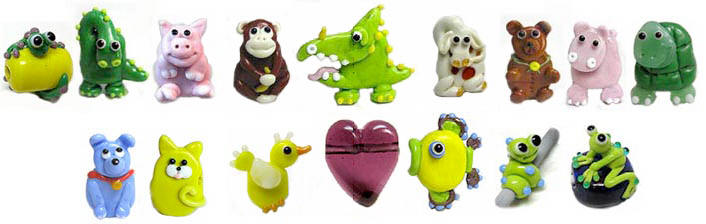
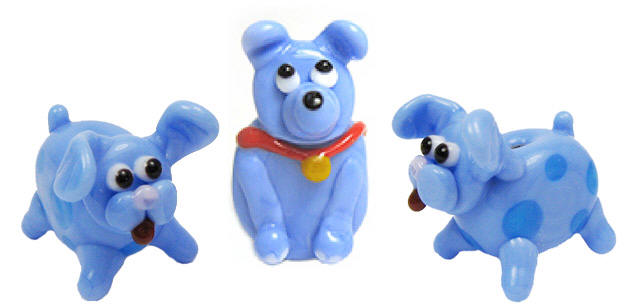
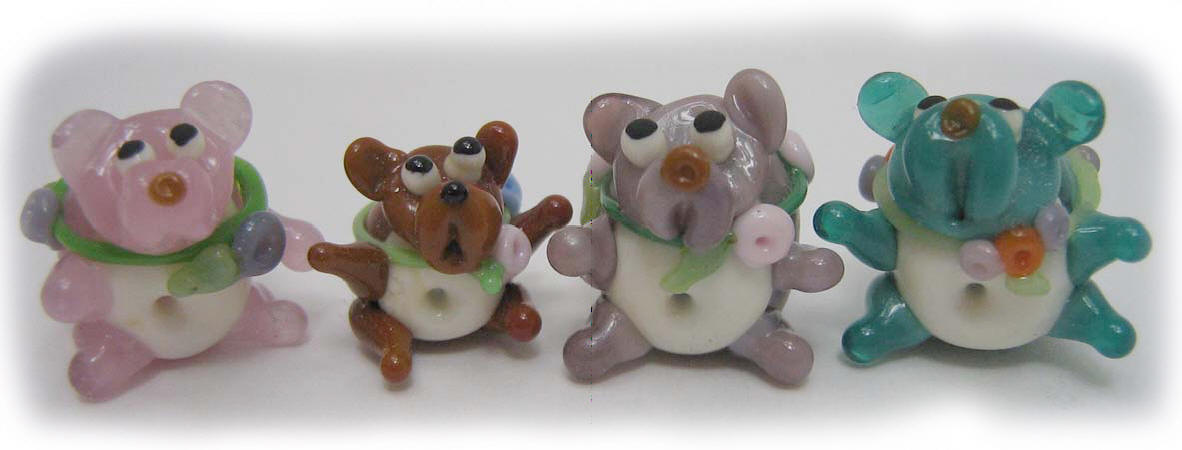
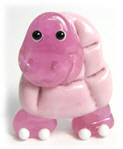
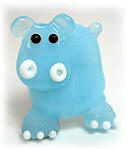
These Workbook Critters have flattened bodies, but you can apply the faces and limbs to
rounded body shapes if you prefer. For example, the center bead above is from the 'Blue the
Dog' tutorial with a flat body and a sideways mandrel position. His pesky friends on either side
of him have rounded bodies that were flattened a bit on the sides, with mandrels in the upright
position and faces made using the tutorials in this Workbook. Most of the challenge of making
Critters is in learning to make their faces and limbs. Use these tutorials to make faces and limbs -
but apply them to any body shape you like.
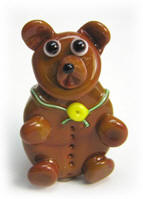
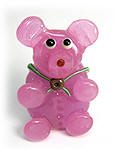
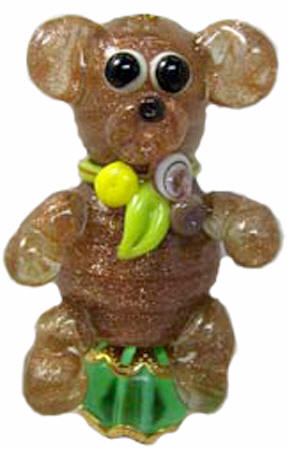
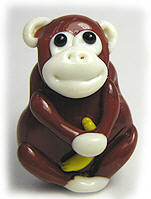
As you can see below, 'Teddy the Bear' can be made in the round just as easily. Any of these
Critters can be created on rounded bodies. Have fun and experiment!
 |
 |
 |
Making these larger Critters in a flattened shape can be a benefit to those who use Fiber
Blankets, Vermiculite or Annealing Bubbles to cool beads, instead of garaging them directly into
an annealing kiln. Flat beads cool easier and are less likely to crack.
These Critter Tutorials were made using a Hothead Torch, to demonstrate that all torch types
can make them. We hope that using this Workbook will give you many years of pleasure.
Please feel free to email if you have questions. We can be reached at
.•:*:•.
 .•:*:•.
One Beary Important Final Note
If your chosen glass is stiff by nature, it may not droop or slump easily when you are making the
beginning base-bead for the flattened body shape. If you are using a stiff glass that will not
droop in the flame, heat the glass through and then press it to flatten it for the body (instead of
waiting for it to droop in the flame). If needed, heat and press again to get the right body
thickness.
.•:*:•. .•:*:•.
Critter Making Tips
People with all levels of beadmaking experience will be using this Workbook, so I want to list
some basic tips for those with less time on the torch. The list could go on and on, but here are a
few of the biggies. If you are new to making Critters I would encourage you to make Willy the
Worm for starters, and then the Katie the Kitty as your first flat Critter bead. She will help you
practice making faces, eyes and controlling stringer-work on her tail.
.•:*:•.
BASIC TIPS .•:*:•.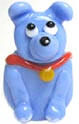 |
 |
 |
KEEP YOUR CRITTER WELL WARMED AS YOU WORK…
As you go through the tutorial steps to makeyour Critter, at each natural pause in the steps be sure to roll your bead in the higher part of the
flame to warm it all over. Be on the lookout for glass color changes in an area you are NOT
working on. If your Critter bead has a section returning to it's cool-glass color it is getting to cold
and may crack or some details may pop off. Take the time to gently and thoroughly re-heat
the bead as frequently as needed to keep it warm and keep it the color it should be while it's
hot. You do not need to reheat to the point of losing details, only to keep it warm throughout
the bead.
Make it your habit to continually roll your bead in the higher part of the flame whenever it is
needed. It should become second nature to keep the bead warm. You will develop a sense
about the timing of it. You will not melt off details if you are re-heating it high enough in the
flame. Watch your bead details as you re-warm, and if you loose any detail simply stop and
correct the problem. You can take all the time you need as you make these little guys… don't
hurry any part of it. When your Critter is done, take the time to stop and look it over carefully for
details that need touch-up.
.•:*:•.  .•:*:•.
DON'T PANIC IF YOUR CRITTER CRACKS OR A PIECE POPS OFF… If your bead cracks you can
usually re-heat the cracked area to a glow from behind the bead (the backside) and use your
tools to join the crack and heal the damage. Don't automatically assume it is ruined. Re-heat it
at the widest crack-point and help the crack close up using your tools. Return the crack area to
a beginning molten state/color and follow the crack-line while re-heating it and working it with
your tools to re-smooth it and heal it. I have repaired Critter beads that have cracked this way.
After you heal the crack, take a deep breath and go back to look for and fix any drooping or
melted details. Often the challenge of fixing damage will advance your skills quicker than
making things will, so make the effort before you give up on a Critter that develops a problem.
.•:*:•. .•:*:•.
GLASS HAS NO MEMORY AND IS IN NO HURRY… Someone once said that glass has no memory -
you can work and re-work it to your hearts delight in most cases (unless it is a particular glass
that is prone to devit). Sometimes as we work WE start getting stressed, and then we need to
remind ourselves that glass isn't on a timetable and it isn't going anywhere - it's in no hurry at all.
This can be a big help to remember.
When you feel yourself getting stressed and hurried, stop, continue to patiently roll the bead
higher up in the flame to keep it warm and take a few breaths… then smile and start in again.
You can continually settle yourself and advance your work and skills by doing this.
 .•:*:•.
 .•:*:•.
KEEP YOUR GLASS ROD-ENDS NEAT… As you finish using a rod of glass, take a second and roll
the end of the rod on a marver while it's molten before putting it down to cool. It will be ready
to work with the next time and the end will be neater when you put the rod away.
.•:*:•.  .•:*:•.
BEAD RELEASE… I use 'Sludge Plus' bead release. I can usually remove it from a bead using
simple pipe cleaners and running water. Shake or stir your bead release well before each use.
Add water to thin it when it starts to get to thick. Dipping and then slowly removing your
mandrel will give you a thinner, smoother coating of bead release. Covering mandrels with a
thick coating of bead release can cause flaking in the fire. Be sure to dry them carefully before
proceeding.
If you need to dip and use a mandrel right away, dip your mandrel and then wave and roll the
mandrel high in the flame until the bead release is dry from end to end. Then bring your
mandrel down into the working area of the flame to heat it and apply your glass.
.•:*:•.  .•:*:•.
REMOVING YOUR BEAD FROM THE MANDREL… To remove a bead from your mandrel, dip it in
water that’s the same temperature as the bead and then, using long-nose pliers (also called
needle-nose pliers), grip the mandrel just above the bead – about 1/4 inch. Use your fingers to
hold the bead and gently start to turn it on the mandrel – gently turn back and forth (make 1/8
inch or less turns to start) to break the bead release. Then make small half twists back and forth
as you move it toward the end of the mandrel. Move the pliers along after your bead (as your
bead moves toward the end of the mandrel) to keep from torqueing and bending the mandrel.
The reason to wet the mandrel is to prevent the bead release from producing dust that you
might breathe. Such dust can accumulate in your lungs and may contribute to a disease
known as Silicosis, which is a lung disease caused by inhaling particles of silica, etc.
.•:*:•. 
 .•:*:•.
WHEN USING A STIFFER GLASS… This was in the Introduction, but we are adding it here too
because it is important to consider when choosing the glass you will use for your Critter.
All of the Critters were made with COE 104 glass. Glass comes in all varieties of soft and stiff
workability. If your chosen glass is stiff by nature then it may not droop easily when you are
making the base bead for the body shape. If you are using a stiff glass that will not droop in the
flame, heat the glass through and then press it to flatten it for the body (instead of waiting for it
to droop in the flame). If needed, heat and press again to get the right body thickness.
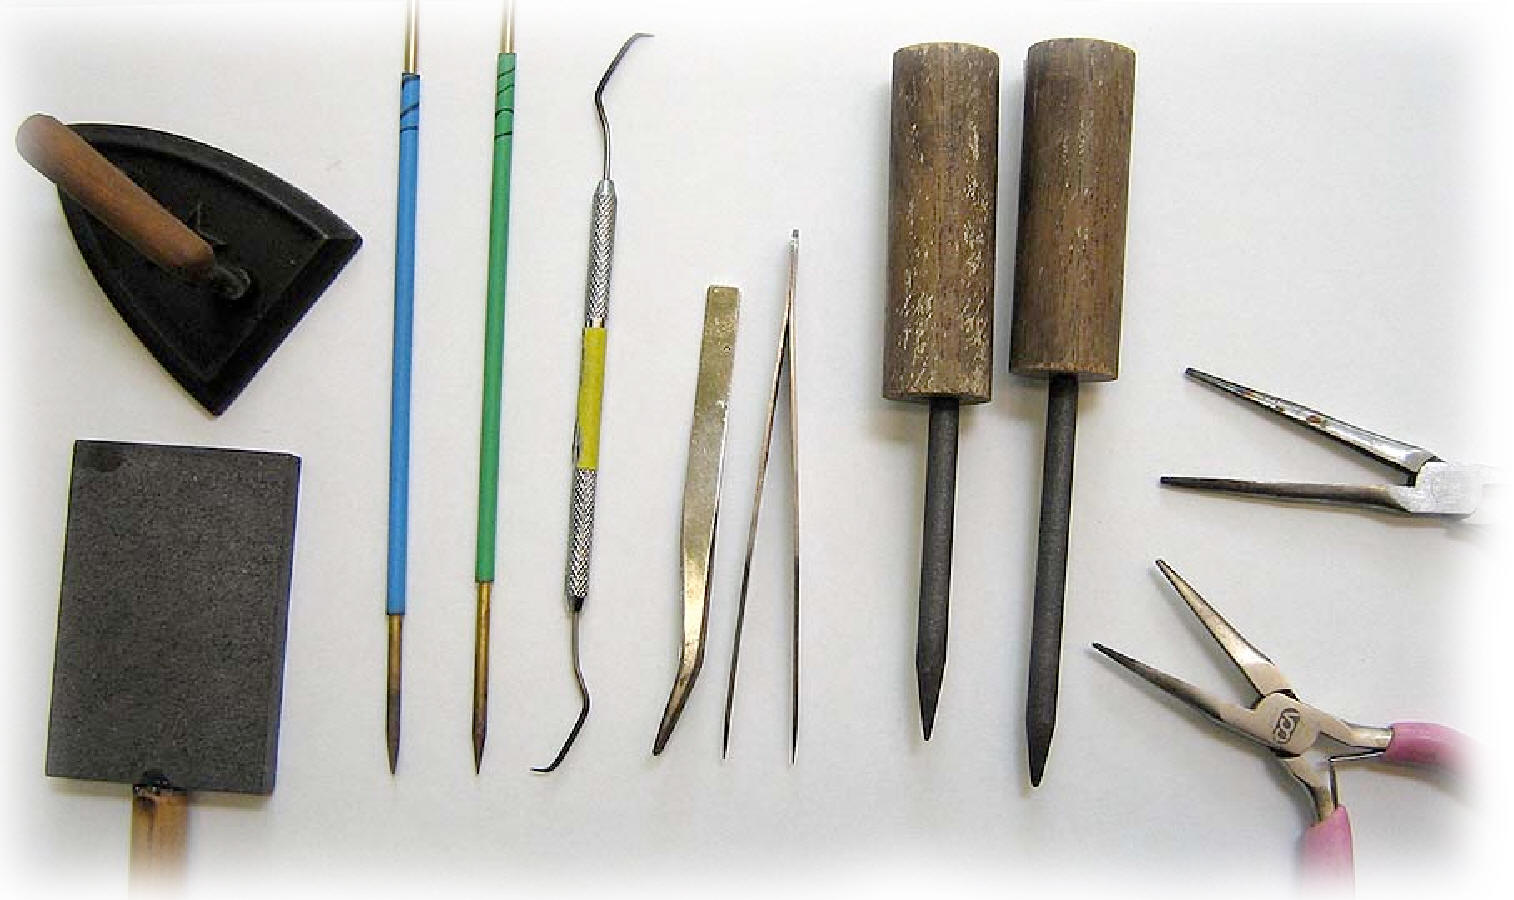
...Useful Tools...
I want to show you the tools I routinely use when I make a bead. Everyone has their favorite
tools, and I have found I need some version of these to manipulate and create the Critters.
Here are the tools I use and what I use them for most of the time.
THE GRAPHITE MARVER - FOR SHAPING & FLATTENING CRITTERS: I have an inexpensive hand-held
graphite marver for all the basic marver uses. To flatten a Critter's base-bead, I use it and a tiny
child's antique cast-iron Iron. It's the simple things in life I guess! You can see the child's iron with
it's wooden handle in the picture just above the marver. You need to be able to flatten beads in
most of these tutorials, so you will need to get the pressing tools that you like best. You can get
creative like I have or there are brass presses that have spacers that you use to set the height,
and you can usually find them online and on Ebay. I like the separate Iron because I can give it
a little twist as I flatten - to spread or round a bottom shape – like a tummy. It's not a must-have,
it's just what I use.
BRASS TOOLS - FOR MOVING GLASS & SHAPING IT: Brass grabs glass but doesn't stick until it gets
to about the same temperature as the glass. I love these small brass tools. The blue and the
green handled ones above have a flat edge and a pointed tip. I use them all the time.
With brass tools like these you can scoot glass or press molten glass to move it, and you can tuck
encasing glass around your mandrel. You can also heat a little face and draw a mouth or
make expressions (for just a few examples of uses). I dip mine in water after each use to
immediately cool it and be ready for the next use. If you do use your brass tool in the flame you
will need to clean off the minerals, etc. that build up as you dip in water to cool, otherwise,
eventually the accumulation will come off on your bead.
It can be hard to find small and more delicate brass tools like these, but I found mine on Etsy for
$25 to $30 for a set of four. On a Hot head you can use brass tools in the flame briefly and then
put them in water to cool them, but on a surface-mix torch they would probably get to hot to
quick. You should move your bead out of the flame before using them if you are on a surfacemix
torch.
DENTAL PIC - FOR RAKING AND PULLING: I really use and abuse this $2 tool! I use it to pull the
dots for leaves into pointed ends, and I use it in the flame to rake hot glass designs. I get away
with it on a Hothead, but I hear that you can melt it into your bead on a surface-mix torch. I find
on a Hothead that dragging dots or melted frit or a design in the flame while molten produces
neat effects but it is hard on tools! I dip the pick in water after each use to immediately cool it
and to shed any hot glass that may have stuck to it.
Some of the Critters in this Workbook are on a base bead that can be decorated in endless
ways – including being sprinkled with frit and twisted or raked, or with flowers and leaves that
you can draw to a point.
When you use a pick to rake glass on your bead, try to hook only the teeniest surface area
(depth) to pull with, don't dig it into your hot glass surface or you will shift your bead.
TWEEZERS - FOR SHAPING, FLATTENING & PINCHING: I use bent-tip tweezers to shape and flatten
things like ears, legs and wings. I gently grip the area to flatten it or shift it. I use the pointed-tip
tweezers to pick things off, or remove air bubbles, or for whatever need arises. I cool my
tweezers in water after each use. They can start to conduct heat otherwise.
GRAPHITE RODS - FOR SMOOTHING, PRESSING & POKING: I don't think I could work glass without
graphite rod tools. They are that useful once you try them. Graphite slides on hot glass. It is
wonderful to smooth with. You can get them at a lampworking site online, or a glass store that
carries them. Be sure to set yours into a base (like these wood dowels) because they
immediately get hot - they are soft like lead and conduct heat right now! I sharpened one for
poking and fine work, and I sharpened and then blunted another one for softer shaping.
PLIERS - FOR PULLING, TWISTING, HOLDING, PINCHING: How can you live without pliers and do
hot glass work? I use mine to pull stringer, pinch off bad tips of rods, and many other uses.
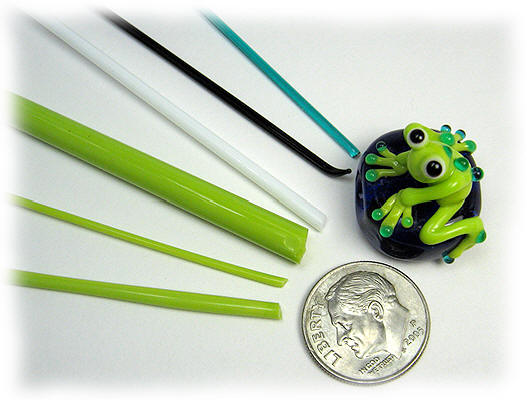
…STRINGER SIZES & HOW TO PULL THEM…
You will need to pull stringers in different thicknesses to make the Critters (or buy them). There
are many web-places to learn to pull stringer, so I won't go into it in much detail here except to
give you these two descriptions.
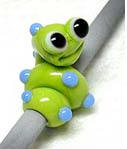
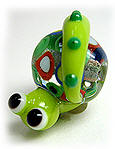
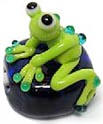
In the picture above you can see the stringers and rod needed to make Freddie the Frog. I pull
the stringer to make his legs and arms in and above the flame, and I pull the toe, black for eye pupils
and contrasting (back-dot) stringers outside of the flame. I find pulling from a gather
outside the flame allows for more control to make a finer stringer. You can see the bottom left
stringer that was pulled in the flame has more thickness variation than the thin stringers pulled
outside the flame. You will want to try both methods to see what works best for you. To pull in
the flame remember that it's all about learning where to hold the rod to keep it just hot enough
to pull, and the rate to pull at to keep the same size stringer coming along.
To pull stringer in and above the flame, heat the end of your rod, make a small pinch with
needle nose pliers for the tab you will pull with, and then slowly begin pulling. You should hold
your rod in and above the flame at the point that keeps the glass flowing at the rate you want
to pull at.
How fast you pull determines how thick your stringer is. Also, pinching a tab first gives you a
slightly cooled, basic width, at the start of the very slow pull, instead of getting a hair thin stringer
right off. Experiment with slowly moving your rod along just above the flame as you pull your
stringer. Then flame-cut your stringer and set it down to cool. Pull the rod away from the stringer
as you flame cut and you get a better ending on the stringer.
To pull stringer outside of the flame, have pliers close at hand and heat your rod to form a
gather at least the size of a large pea. Take it out of the flame and watch as it's skin changes
color. As soon as you see it 'skin over' use your pliers to pinch a bit and pull down. You can also
pull the rod/gather away from the pliers. How long you wait to pull and how fast you pull
determines the thickness you get. Try it a number of ways and see what happens!
.•:*:•.  .•:*:•.
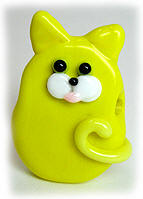
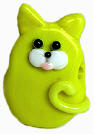
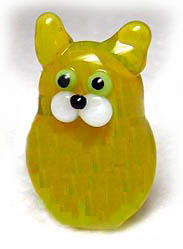
…How To Make Katie The Kitty…
This sweet Kitty will give you practice slumping and flattening, and then putting a little dot face
on and drawing a tail with a stringer. Her ears may give you a bit of a challenge because they
lose their point pretty easily in the radiant heat. Be sure you apply big enough ear dots and a
bit more to spare to allow you to remove the 'spare' as you pull the ear tips to a point a few
times - until you are happy with the shape. When you draw on her tail you roll the bead from
back to front, so be sure you preheat the area before you start, and then apply the stringer with
light firmness so that you seat it onto the body, or you may have a tail section that you didn't
seat well pop off.
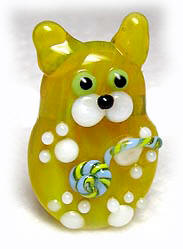
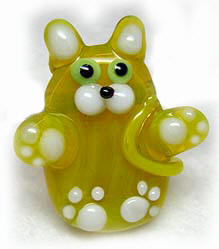
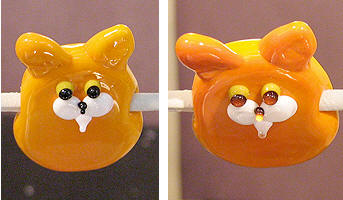
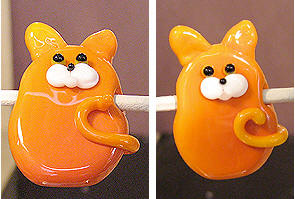
Have fun making her in different colors. For example, put transparent stripes or dots on her and
melt them in before you press…or put flowers on her tummy or at her ear, the options are
endless. In the Variations below you can see her with a Yarn Ball made from a twisty on the left,
and with paws reaching out to you in the middle. If you add the paws and inner ear dots, wait
until the end to add them or you will melt them in by radiant heat (from working the face). You
can see that in the picture below so beware! I show the picture to remind you that sequence
matters!
WHAT YOU WILL NEED…
1. Rod of yellow
2. Green stringer for eye-base dots
3. White stringer for the nose/cheek pads
3. Thin black stringer for eye pupils and nose
4. Pink stringer for the tongue
5. Thick yellow stringer for the tail
6. Thick mandrel with bead release
7. Smoothing/flattening/shaping tools (like a marver and graphite rod in a holder)
VARIATIONS…
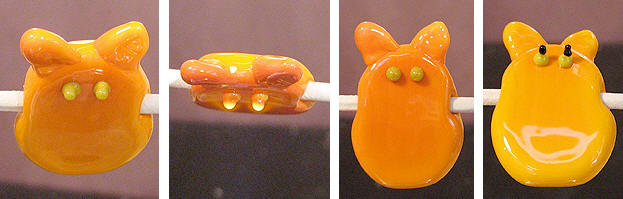
HOW TO MAKE THE BODY...
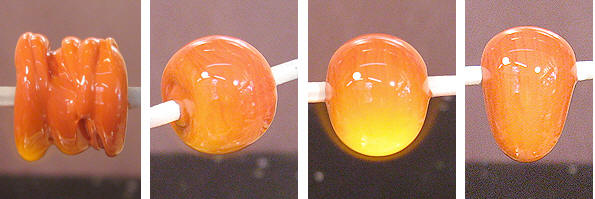
1. Heat your yellow rod molten on the end and wrap your mandrel in a barrel shape. Make sure
it is at least 5/8" to 3/4" wide. If you make your barrel the same height on the edges as in the
middle it gives you the glass you need to make a nice round. Glass wants to pull to the center
and form a round, so the barrel shape is the start of a good round bead.
2. Round the barrel into a ball with nice sides. Use a bead shaper or heat it molten and then
remove it from the flame and slowly turn. The cooling will help pull it into a round shape. Reheat
and repeat to get it to come more round if needed. Perfection is not required because you are
going to make it droop when you are done.
3. Once you get it rounded with nice sides, slowly heat the front to a glow and cause it to start
to droop (slump) and then switch hands and heat the back to increase the droop (see the third
and fourth pictures above).
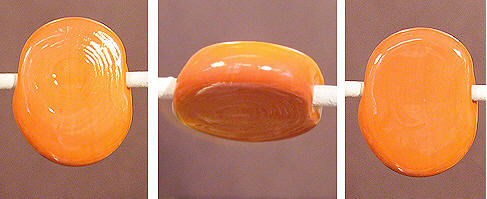
4. When you have a nice droop, use your pressing tools to flatten the bead. I press straight
down and just a bit from the top of the bead toward the bottom to get more width across the
bottom. It will depend on what tools you use to flatten. As you press be sure to leave at least
half the thickness of your mandrel in glass above and beneath the mandrel. Don't press to thin.
Usually the cooling stops you from pressing to thin, but beware.
5. Once flattened you will need to polish the ridges off. Ridges are created by pressing the hot
bead on a cold surface. Face your bead toward the flame on one side only (don't twirl the
mandrel and try to do both sides, that will destabilize your bead). Gently waft in the flame until
you polish out the ridges. Let it cool just a bit and then do the other side. Polishing only one side
at a time allows the cooler side to hold your bead flat (see the middle picture above). You
want a slick surface to work on. Ridges catch the light and your eye will notice them. Leaving
the ridges unpolished will make your Critter less attractive.
HOW TO SHAPE THE HEAD & BOTTOM...

6. Roll your bead upside down or sideways to heat the top of your bead. Use your marver to
gently shape the head/top. You want a nice rounded shape above the mandrel for the ears to
sit on (see the second picture above). Now heat the bottom and flatten it a bit. Shape the
sides as needed.
HOW TO APPLY & SHAPE THE EARS...
7. Heat the end of your yellow rod and apply a large dot for the left ear. Apply a second dot or
wrap. Heat gently and use your tweezers to softly grip the ear dot and flatten it (see the middle
picture above).
8. Gently heat the ear and using your graphite tool or tweezers, shape it by smoothing upward
to make the rounded point at the top. Gently heat and pull to a point if you like, or you can
wait until the end to do it. It will return to a soft point due to referred heat as you work on other
things, so count on reshaping the ears at the end.

9. Repeat the previous two steps to make the right ear. Finally, heat each ear gently as you pull
them to a soft point. Wait until the very end to repeat this if you want sharper pointed ears.
HOW TO MAKE THE EYES...
10. Using your green stringer, apply two dots for the eyes. Heat them just long enough to make
them round. Heat the very tip of your black stringer and apply two eye dots. Don’t melt them in
because the radiant heat from making the cheeks will round them.
HOW TO MAKE THE CHEEKS...
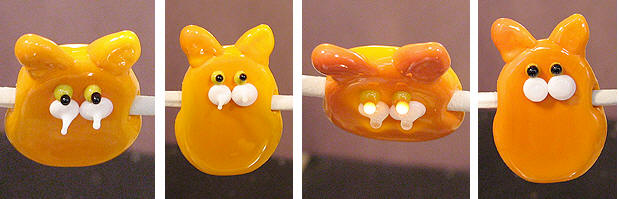
11. Heat your thick white stringer or a rod and apply two cheek pads just below your eye dots
and right against each other. Gently heat them and press them flat with a tool. The heat
should round the eyes. If not heat just a bit more to make the eyes go round.
HOW TO MAKE THE NOSE & TONGUE...
12. Using your black stringer, heat the tip and apply a little dot for the nose. Then using your
pink stringer heat the tip and apply a larger dot for a tongue in the bottom center of the cheek
pads.
13. Heat them gently to make the nose glow and then use a pointed tool to barely press it flat.
You can also use a Dental Pic to pull down the bottom of the nose like an upside down triangle
if you want to get fancy (I didn't).
HOW TO APPLY & SHAPE THE TAIL...
14. Gently heat the back of the kitty and then heat around to the front – preheat where ever
the tail will be applied. You want the surface to be preheated to ‘seat’ the tail as you draw it
on. You need to make sure it seats as you draw it on, or it can pop off where ever a cool
section happens.
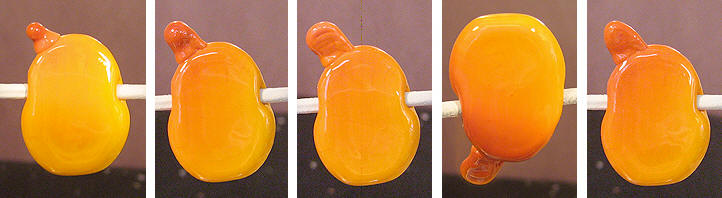
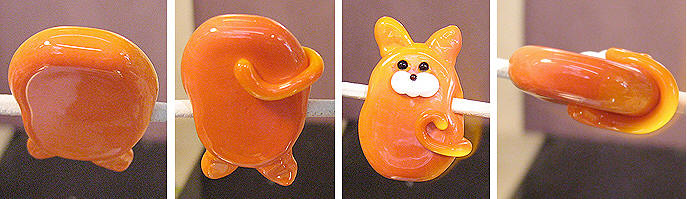
15. Ready to draw the tail? With your bead above and/or beside the flame (as needed for
stringer control) hold your bead upside down (see the first picture above). Gently heat the tip
of your stringer. Set your stringer down and start your tail on his hiney (see the second picture
above) and lightly but firmly press the stringer as you draw his tail on. When you have drawn to
the side of the bead, hold your stringer steady and roll the bead to the front and then continue
to draw on your tail. Just before you get to where you will stop, begin to lift and flame cut the
tail end (see the third picture above and the first one on the bottom left below).
When you have applied your tail, gently heat the tip and use your tool to set the tail tip into the
position you want it in. Then go back and heat the length of the tail to a glow all along it's
route. Bring it to a gentle glow. You don’t want to melt it in, but you do want to be sure it is
seated on the body with heat.
16. In the left picture above you can see the tail before I used a tool to move the tip of the tail
into the final position. The right picture shows you the tail after it was placed and reheated.
Your kitty is now done. Take a breath and then heat the ears from behind and pull the tips if you
like. Check to see if any other details need touching up and then slowly reheat her and then
garage her.
Now congratulate yourself – you've made a PURR-fectly sweet Kitty!